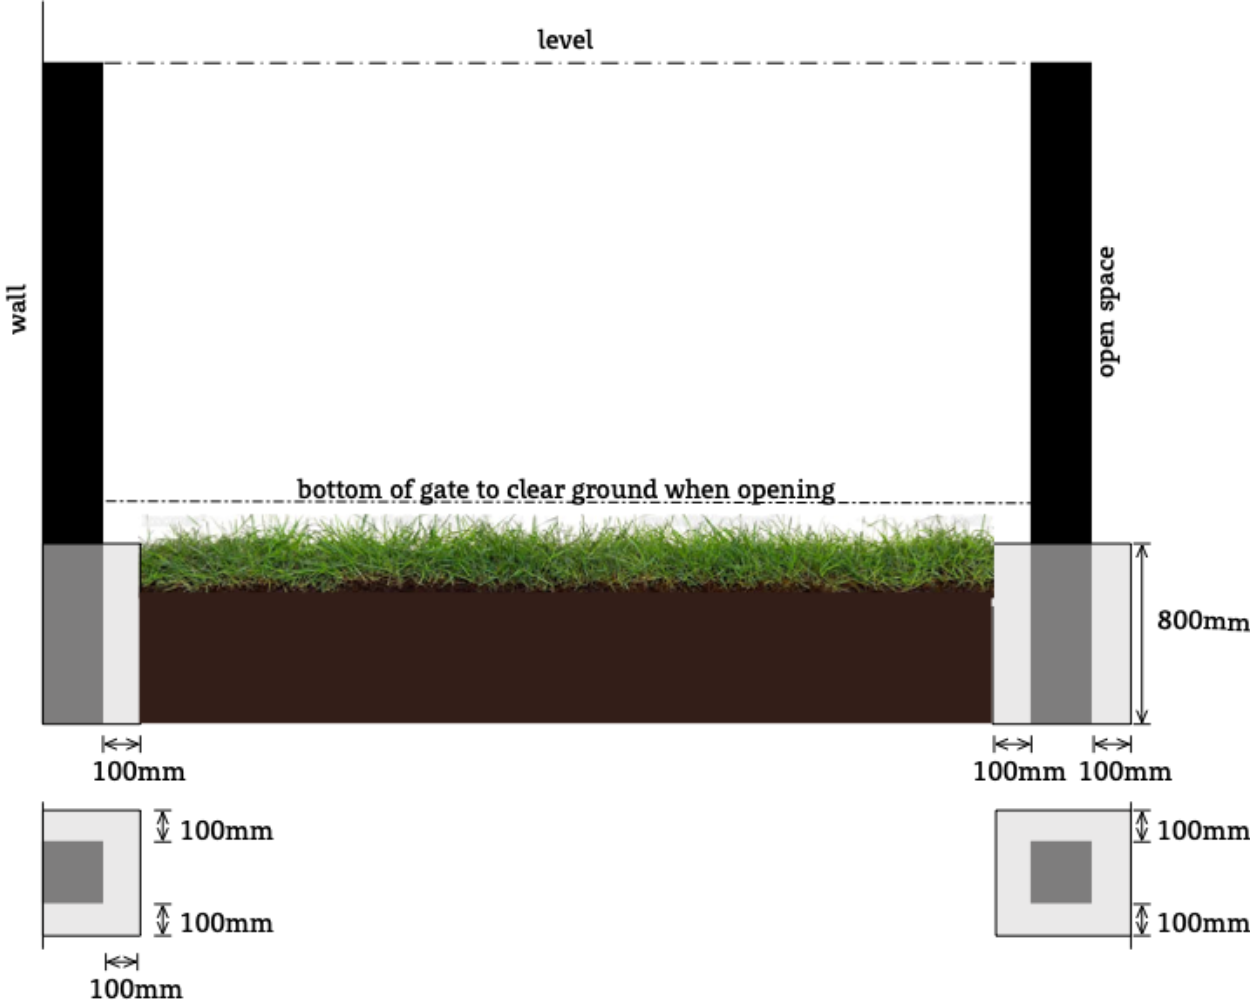
How to install posts into the ground

Step 1
Visually check the area for signs of services, water stop taps, drains, fall pipes, gas meter, electric etc
Step 2
Mark out the area for excavation allowing 100mm each side of the post position, if the post is hard up against a wall the disregard the back space.
Step 3
Dig out the hole to approx 800mm depending on your levels and gap required. make them as square as possible. while digging keep an eye out for any services.
Step 4
Fit the post in postion, ensuring you have marked the bottom of the gate on the post to make sure you have left enough clearance. Check levels both sides of the post are plumb and that your hinge pins are facing the direction the gate is swinging open.
Step 5
Pour in approx 15L of cold water, then empty postmix into the water until the dry mix is coming to the top. Ensure the mix is all the way around the post, a trowel would be handy. For an extra strong install on large gates, fill the hole 2/3 of post mix to hold the post in place then do a wet mix of concrete to top it off.
Repeat the process checking the width between the posts when setting the second post, ensure both post tops are fitted level. Leave the posts to set 24 hours before hanging the gates.
Tools that may be required
– 4ft spirit level
– String Line
– Grafter/ concrete breaker(if req)
– Spade/ (Spoons are better)
– Bucket
– Stanley knife
– Trowel
– Pencil or chalk
